If you haven’t already taken part in this little game then look no further and click HERE so you can see the original post. These are the answers to that post so you don’t want to look at this until you’ve had a go right?!
NO PEEKING!! :p
If you haven’t already taken part in this little game then look no further and click HERE so you can see the original post. These are the answers to that post so you don’t want to look at this until you’ve had a go right?!
NO PEEKING!! :p
Phew that is a mouthful!
Who can say that quickly after a drink or two?? 😀
I have a little party game for you all here.
You may remember something like this when I was away on my holiday in September. The post was Which Hamster Do You Belong To?
Here is the nose version of the game because I couldn’t resist the title pun. I am so easily pleased I tell yah.
Comment all your answers below!
Good luck folks! Answers will be published on Monday so follow to make sure you dont miss out on the results!! ~
Have any ideas??
xxxxxxxx
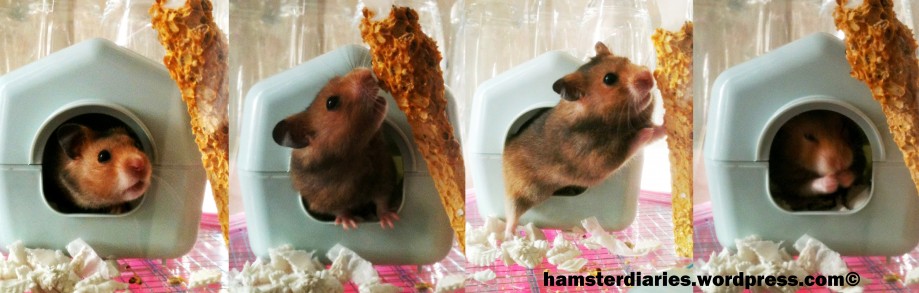
Did you see yesterdays post?? NO?!?! CHECK IT OUT BEFORE READING ANY FURTHER!!! Not allowed to peek at the answers 😀
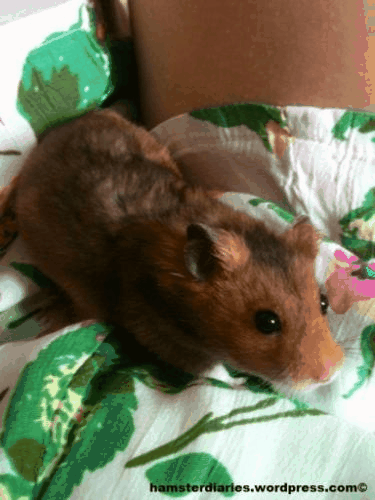
I spend a laaaaaaarge majority of my time oogling and admiring my three gorgeous hamsters. All pet-owners will agree that you get to know every inch of your pet inside and out because they are there day in day out.
I thought it would be cute to set up this little quiz.
Below there are 6 pictures of either Dexter, Eve or Casper. They are only small photos of just an eye or a nose or a paw etc, and your challenge is to guess which hamster body part, belongs to which hamster! Sounds easy right? I have tried to challenge you here so have arranged the answers to be in tomorrows post. Yes these are my lazy holiday posts… make the most of few words folks haha 😛

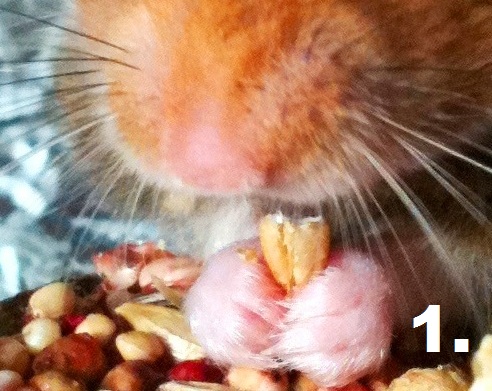
A.

B.

C.

D.

E.

F.
So think you know Dexter, Eve and Casper as well as you think?! Answer A,B,C,D,E and F in the comment box below and tomorrow you shall see the pictures in their original pics 😀
GOOD LUCKKKKKKKK
xxx
In the past couple of weeks I have spent a HUUUUUUUUUUUUGE amount of money on toys for my two lovely hamsters.
And I mean a seriously unjustifiable sum of money.
So while I was worrying that my hamsters might get bored, I had an idea to build a tunnel-style maze for my hammys!
Below is a picture of the end result.
It may not look very professional but it is made up of recycled bottles and so was free!
Thats right, Hamster Diaries is being thrifty!
P.s This is not a toy to be left in a hamsters cage for long periods of time as its made up of lots of plastic; nibbling for long on plastic may lead to sharp edges and upset hamster.
This can be used when you are playing with your pet for short periods of time.

I have put together a step-by-step guide together of how I have done it if you want to make your own at home!
This is very much a maze you can add to (as I suppose its hardly a maze yet but you get the jist of it) and can be customized for whatever your pet needs may be!
Interested?
PLEASE NOTE: I used sharp tools to make this, so pretty please take extra care if you do attempt this 😛
 What you need:
Time Required:
Approx. 30 minutes
Procedure:
1. Firstly, wash out all of the bottles – you don’t want smelly and sticky tunnels for your pets!
Also remove the labels and lids; they just get in the way!
I have started off this project with 4 bottles but this can easily be added to at any stage – its just a matter of storage afterwards that is a hold-back. See how many different colours you can get with the bottles, really personalise your maze!
2. CAREFULLY use the stanley knife to remove the top and bottom of each bottle in turn.I recommend you do this on a sensible solid surface. I am a terrible role model as I did this on top of my bed but I am giving you the heads up now – I very nearly sliced holes into my lovely duvet and wouldn’t want anyone else to do the same!
Also please be aware that the edges you cut will most probably be jagged and sharp. We will sort that out in step 3.

3. This is where the electrical tape comes into play. Electrical tape is perfect for this project as it sticks to plastic well and also sticks round corners well.
Covering over the jagged edges is important as you don’t want to cut little paws!
Take short strips of tape and stick them half down onto the rim of the bottle. Then make cuts into the tape approximately 1cm apart, and stick down onto the other side. This means that the tape sticks better round corners.
Its very time consuming but is also very important.
Once you’ve done all this to all the bottles you have you are ready for step 4.

4. In preparation to join two of your bottles together in a ‘T’ shape there is a lot of fiddley cutting to do.
Using the stanley knife, slice a ‘+’ into the side of one bottle.
Peel the plastic back being careful not to yank too hard as the plastic will “rip” and the bottle is rendered useless!
This then allows a little room for scissors to slip in and you should be able to cut a circle shape just about.
Then using the method as before, use 1cm strips of electrical tape to cover the entire edge of the newly cut circle.
 5. Take the bottle you wish to attach to the first and squeeze the bottle as flat as you can make it (harder than it looks).
Cut diagonal lines across the top and bottom, as shown in the first picture, which will give the edge a curve in which the first bottle will sit comfortably, as shown in the second picture.
Dont worry too much about cutting off an already taped up section as you can just re-tape it at this stage. It tends to look neater too.

6. Holding your two tubes together in place, you should notice the tube you completed in step 5 fits snugly against the tube you completed in step 4.
Whilst holding them in position, use one long piece of tape to attach the first side and let it stretch all the way round the other side until it attaches the bottom side of the tube too. That isnt worded very well and Im not sure my photo explains it any better, sorry!
Basically just use a few pieces of tape to hold the tubes together in place. I trimmed bits of tape so it looked neater as I have obsessive tendencies.

7. Now your two tubes should look something like the following picture.
But you still have 2 tubes to use right?
Go back to step 4 and repeat the steps from there for them two tubes.
…
You already repeated that bit? Good, now you should have two sets of two tubes that look something like the following picture!

8. The final thing to do is to position your two sets of two tubes together in a straight line and tape them together.
These two bottles just so happened to slot together comfortably so taping them together wasn’t too stressful however if your tubes dont fit snugly, mix and match a few other ends to see what works closest and is therefore easier to attach!

So the finished article is ready to go!
Using the really rubbishy playpen I slated in my post ‘Theres no escape! Oh wait, yes there is!’
(https://hamsterdiaries.wordpress.com/2012/06/04/theres-no-escape-oh-wait-yes-there-is/ )
I put the newly created tunnel maze into the pen and got both hamsters to test it out!
(VIDEOS COMING SOON)
 Both Dexter and Eve went through the tunnels, maybe with a little encouragement, but even so!
I would have spent another £30 easily on buying 4 plastic tunnels from a shop whereas this was free, killed some time, is see-through so sneaky hamsters cant hide away and looks so much cooler!
There is definitely some room for personalisation here too!
Not only personalisation but this whole thing can be added to so easily!
Never need to throw away a plastic bottle again now!
Hope you’ve enjoyed my little creative streak!
I think the hamsters did…
If anyone tries this themselves, feel free to email me the photograph (hamsterdiaries@yahoo.co.uk) and Ill pop it in a post!
So what do you think? Got any ideas for home-made toys yourself?
Comment, like and follow! 😀
xx
What does every hamster need in its cage?
A wheel of course!
It gives all small rodents the opportunity to exercise in its cage as well as keep its owners awake at night with the monotonous patter of ickle paws on plastic!
As Dexter is proving in this picture, the exercise wheels provided in some cages are not sometimes up to scratch! 
The cage I have for both of my hamsters, is the basic starter kit offered in most pet stores.
It consists of a plastic base, a plastic food bowl, a bottle, a wheel and a bog-standard house. (It also comes with free sawdust, bedding, food etc. if bought at Pets at Home)
The wheel in this cage has several flaws:
So, after a restless hamster made it obvious he needed something to stimulate him, we bought a ‘stand-alone’ wheel.
This is from the same company who made the completely pants ‘indoor/outdoor playpen’ (https://hamsterdiaries.wordpress.com/2012/06/04/theres-no-escape-oh-wait-yes-there-is/) so I cant say I had high hopes.
The wheel itself was £9.99 (rather EXPENSIVE for what it is but one of the only options available). It can be fixed to a wire cage if you so please, but works particularly well on its metal free-stander-thingy-ma-jiggy.
 It solves all of the problems I had with the original wheel!!!
It moves with the lightest touch (ideal for lightweight hamsters), it is held at the perfect height above the base and is considerably larger so fits full-grown rodents like Dexter in.
It even has a flashing rudolph-nose thing in the middle which lights up when the wheel is spun – neat eh!!
Fabulously entertaining when showing off the hamster to guests; slightly annoying however when the entire room lights up at 3am because the hamster decides to go for a quick run!
So we have ended up taking out the original plastic wheel and put in its place the new flashy awesome wheel.
He didn’t stop running on it for at least 3 hours… Making up for lost time perhaps?
And when I say ‘running’ I mean sprinting. His legs move so quick they are a mere blur beneath him. Kinda impressive for a furry thing.
Im secretly hoping that this new wheel will help trim Dexters tubby tum in as hes gotten a wee bit chubby over the last couple of weeks – we’ve been indulging him, guilty.
As its quite an expensive purchase, Eve will have a wait till payday to get her flashy new wheel.
In the meantime, I have a new video for you all to view of Dexter in his flash new wheel.
I know a few readers have the same cage
so what do you guys think of the wheel provided?
Have you got new ones or are your pets happy with the original wheel??
Enjoy!
So now it is Dexter’s turn to hog the limelight in another toy review/not-so-bitchy session!
Where oh where can you go wrong with a see-saw!
I was never any fun on a see-saw myself as a kid. One bad experience of landing like a ton of spuds on my tailbone was enough to put me off see-saws forever!

BUT, for my beautiful hamsters I am sure there wont be that problem!
This small wooden see-saw is flat-packed by Pets at Home for a reasonable £2.69 and is super easy to assemble! (I still got my boyfriend to do it though, cringe)
Despite it being easy to put together, the wood split instantly when popping everything into place and the whole thing wasnt exactly stable!
BUT it looks the part and does the job – depsite the split wood – so I cant complain.
Dexter is heavy enough for it to tip just as he crosses over the middle but Eve who is lighter has to tread right to the end to experience the whole see-saw effect!
As well as being cute to watch them walk over, it also serves the purpose of gnawing down teeth and acting pretty much as a glorified chew toy!
I can live with that…
Its lightweight and blah blah blah.
I would recommend it as a toy. It entertains, is multi-functional and doesn’t require constant supervision, like a certain other toy I have reviewed.
Dexter approves.
Eve approves.
We have ourselves a good product!
Got one? Want one? Binned one?
What do you think?
xx
Click on the image to find out how!
 I am hoping it will all be worth it on Christmas but until then I will have to remain all rushed and busy.

